Quick start: Self-service for IaC
Let developers provision infrastructure themselves using reusable, guard-railed templates — no tickets, no waiting.
Overview
This guide walks you through the Self-service for IaC onboarding path in StackGuardian. By the end, you'll have connected your IaC repositories and a cloud provider, and you'll be ready to build your first deployment template.
Prerequisites:
- A GitHub or GitLab account with at least one IaC repository
- A cloud provider account (AWS or Azure) with the necessary credentials
Step 1: Choose your onboarding path
When you first sign in, StackGuardian asks what you'd like to do first. Select Self-service for IaC to build reusable blueprints that anyone can deploy without writing code.
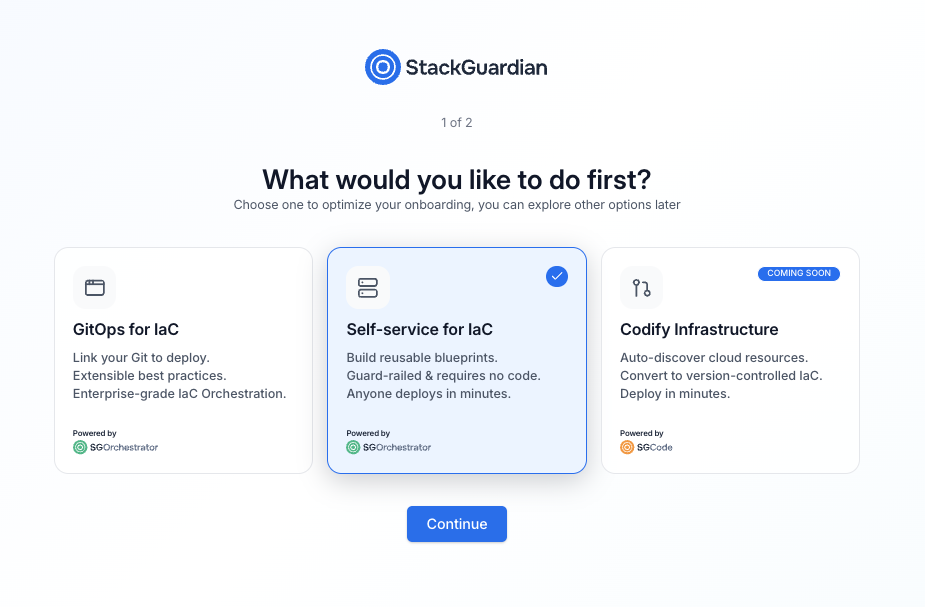
Onboarding path selection screen
The three available paths are:
- GitOps for IaC — Link your Git repositories to deploy infrastructure using version-controlled code
- Self-service for IaC — Build reusable blueprints that teams can deploy without writing code
- Codify infrastructure — Auto-discover and convert existing cloud resources to IaC (coming soon)
Select Self-service for IaC, then select Continue.
You can switch to a different path at any time from the SGOrchestrator overview page.
Step 2: Set up your organization
Enter a name for your organization. This is the workspace where your workflows, stacks, templates, and connectors will live.
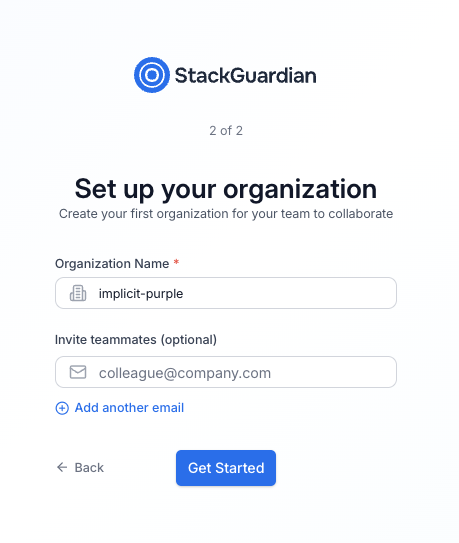
Organization setup screen
| Field | Required | Description |
|---|---|---|
| Organization name | Yes | A unique identifier for your organization. Use lowercase letters and hyphens. |
| Invite teammates | No | Enter one or more email addresses to invite collaborators. You can also do this later. |
Select Get started when you're ready.
Step 3: Connect your tools
After setup, you'll land on the SGOrchestrator overview page. The Getting Started with Orchestrator panel in the bottom-right corner guides you through three steps: connecting your tools, connecting a cloud provider, and building templates.
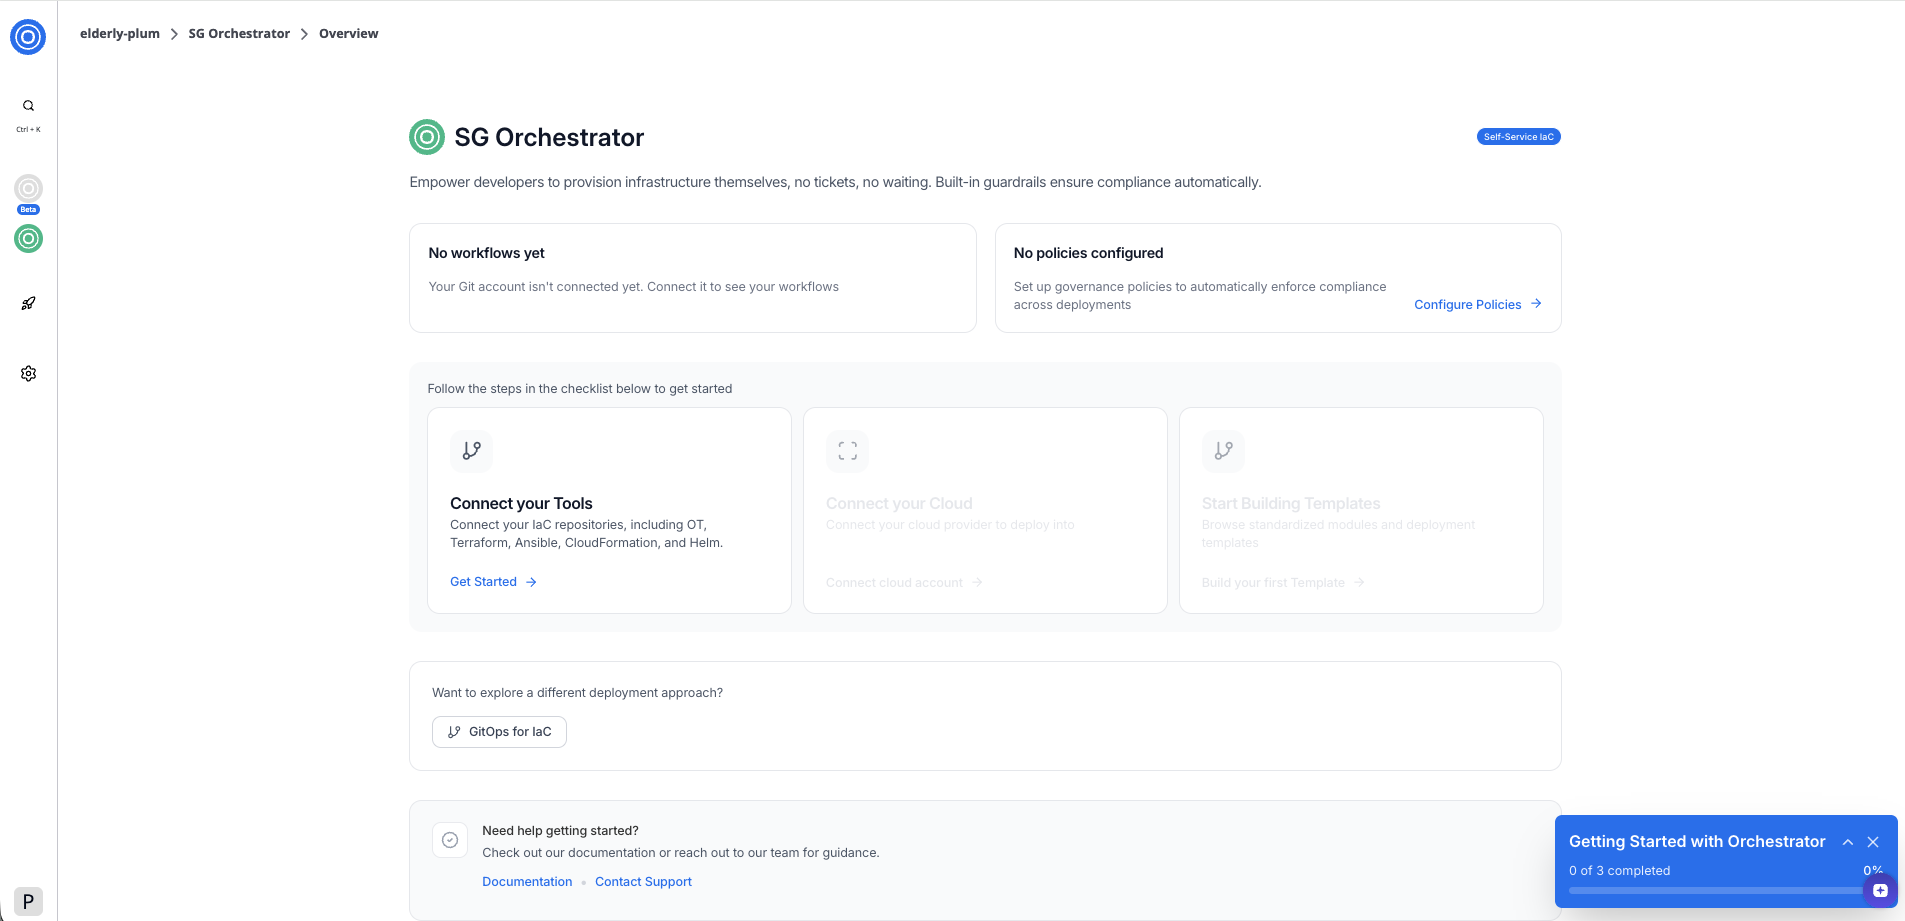
SGOrchestrator overview page in Self-service for IaC mode
To connect your IaC repositories:
- Select Get Started in the Connect your Tools card.
- In the dialog, select your Git provider — GitHub or GitLab.
- Follow the authorization flow. StackGuardian redirects you to your Git provider to grant access.
- Select the account or organization where you want to install the StackGuardian app.
Once authorized, you'll return to the overview page. The Connect your Tools card shows a confirmation that one version control system is connected.
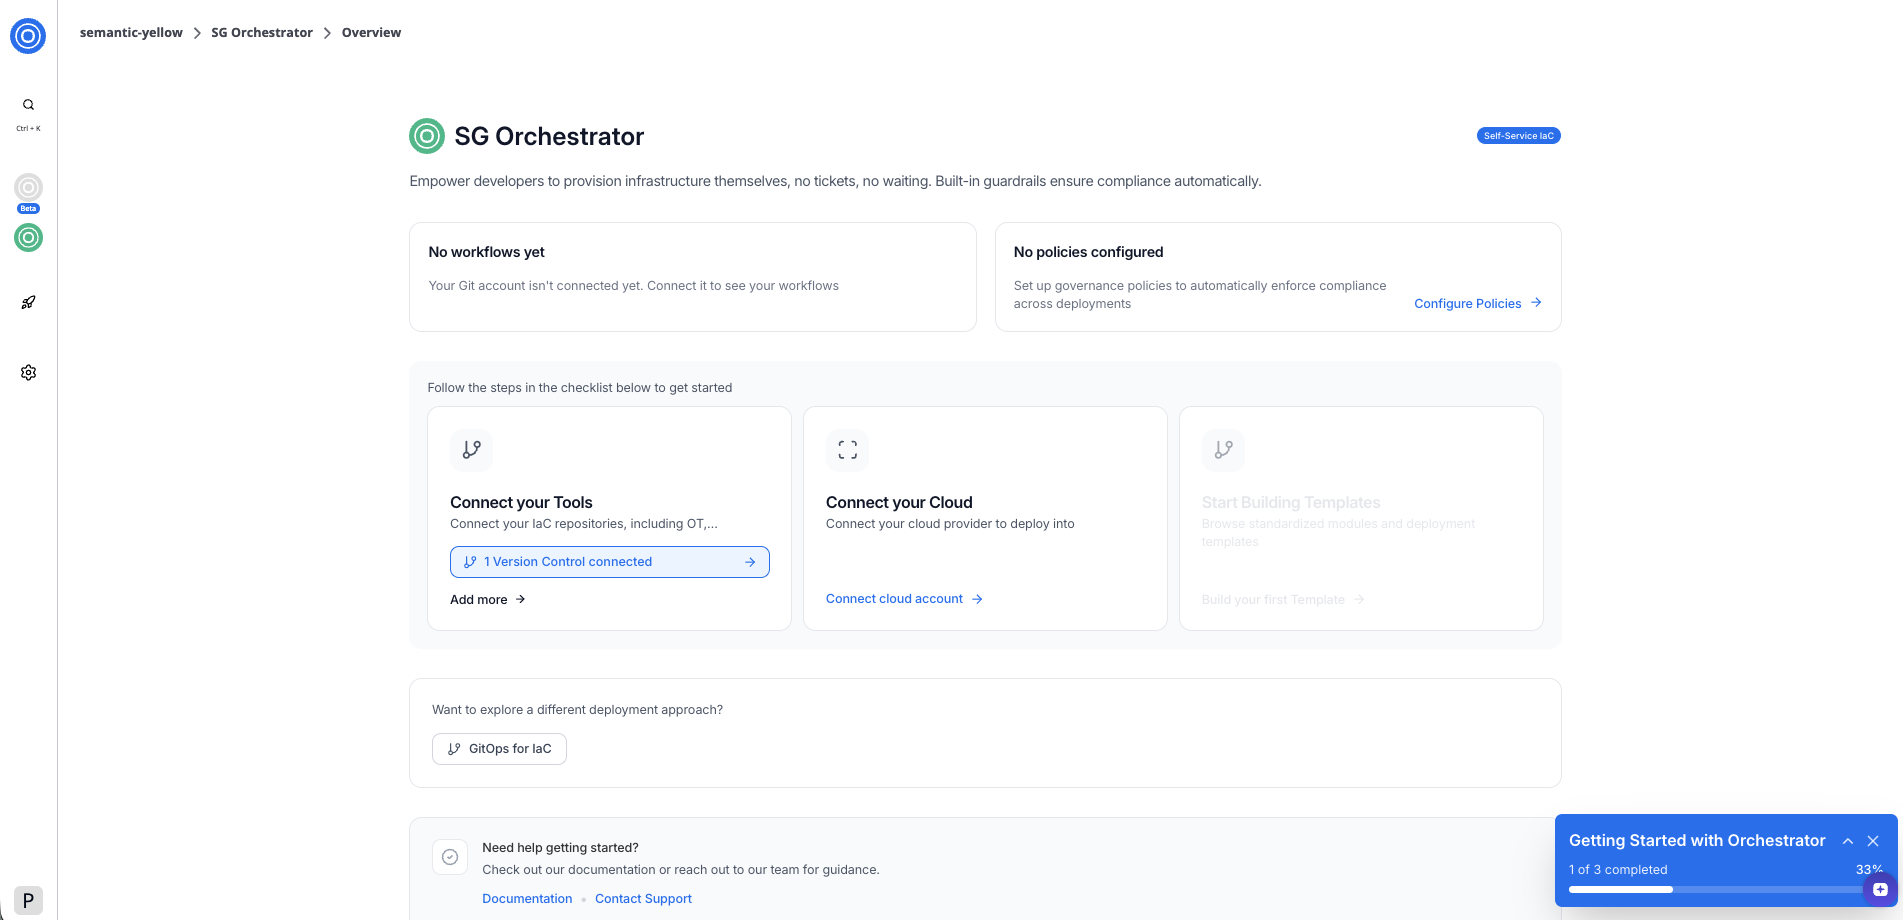
SGOrchestrator overview page
Step 4: Connect your cloud provider
With your tools connected, the next step is to link a cloud provider. This allows StackGuardian to deploy your templates into your cloud account.
To connect your cloud provider:
- Select Connect cloud account in the overview card.
- In the dialog, select your cloud provider — AWS or Azure.
- Select an authentication method — RBAC (role-based access control) or OIDC (OpenID Connect).
- Enter a connector name. Optionally, add a description and tags.
- Enter your AWS Role ARN in the format
arn:aws:iam::<account-id>:role/<role-name>. - Copy the pre-filled External ID for the role — you'll need this when setting up the trust relationship in AWS.
- Select Add Connector.
Ensure you have the necessary credentials from your cloud provider.
AWS Role ARN
To authenticate with AWS, StackGuardian uses an IAM role with a cross-account trust relationship. You'll need to:
- Create an IAM role in your AWS account.
- Add StackGuardian as a trusted entity using the external ID shown in the form.
- Attach the permissions your templates need (for example,
AdministratorAccessfor full access). - Copy the role ARN from AWS and paste it into the AWS Role ARN field.
Once connected, the Connect your Cloud card shows a confirmation and a 1 Cloud Connected button. The checklist shows 2 of 3 complete and the Start Building Templates step becomes active.
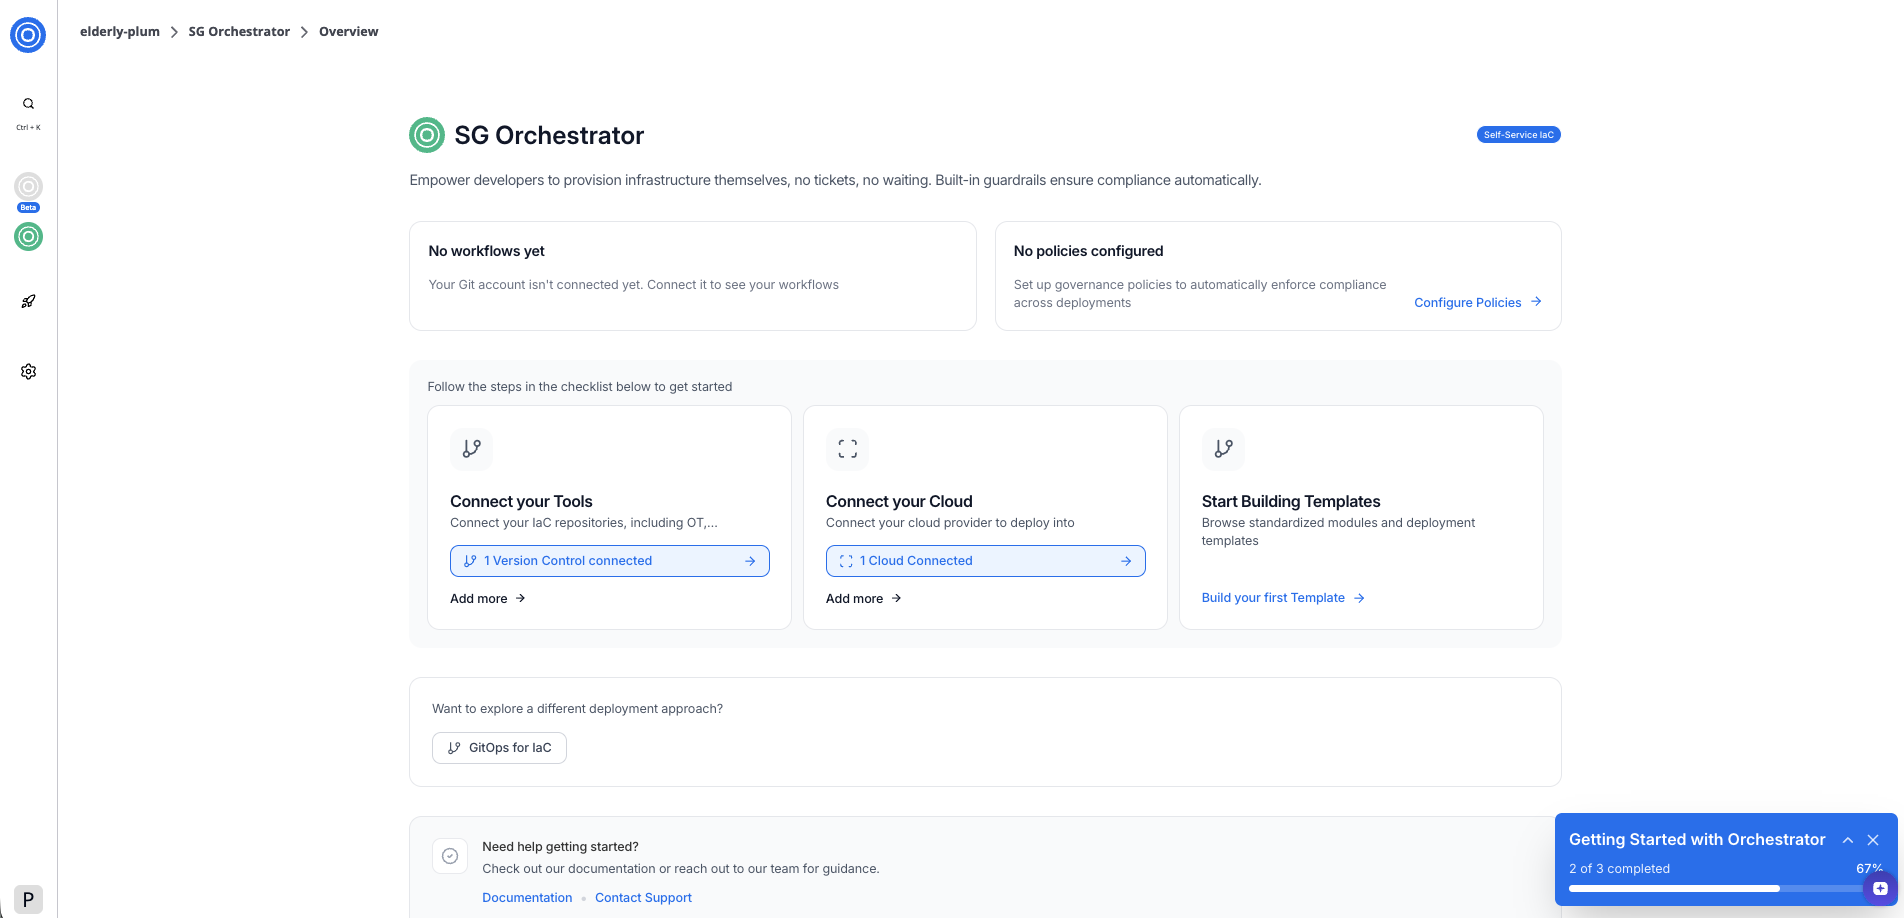
SGOrchestrator overview page
Step 5: Build your first template
With both your tools and cloud provider connected, select Build your first Template to browse your connected repositories and create a reusable deployment template.
Next steps
Now that your environment is set up, you can:
- Build a template from one of your connected repositories
- Explore GitOps for IaC to deploy infrastructure directly from Git