Connect Azure to StackGuardian
Overview
StackGuardian offers three secure methods for connecting to Azure, each tailored for different security and operational needs. To create a connector with StackGuardian, follow these steps:
-
Create StackGuardian App in Azure: Begin by registering your application in Microsoft Entra ID to establish its identity.
-
Set up authentication: After registering the app, configure your connector using one of these methods:
- Service principal with federated credentials - Authenticates using short-lived tokens instead of long-lived secrets.
- Service principal with client secret - Employs a secret key for authentication.
- Managed identity - Authenticates using an identity already configured in your Azure environment, without managing secrets.
After completing the app registration in your Microsoft Entra ID, ensure the application has read-access to your desired subscriptions and that correct credentials are provided to StackGuardian.
Create StackGuardian App in Azure
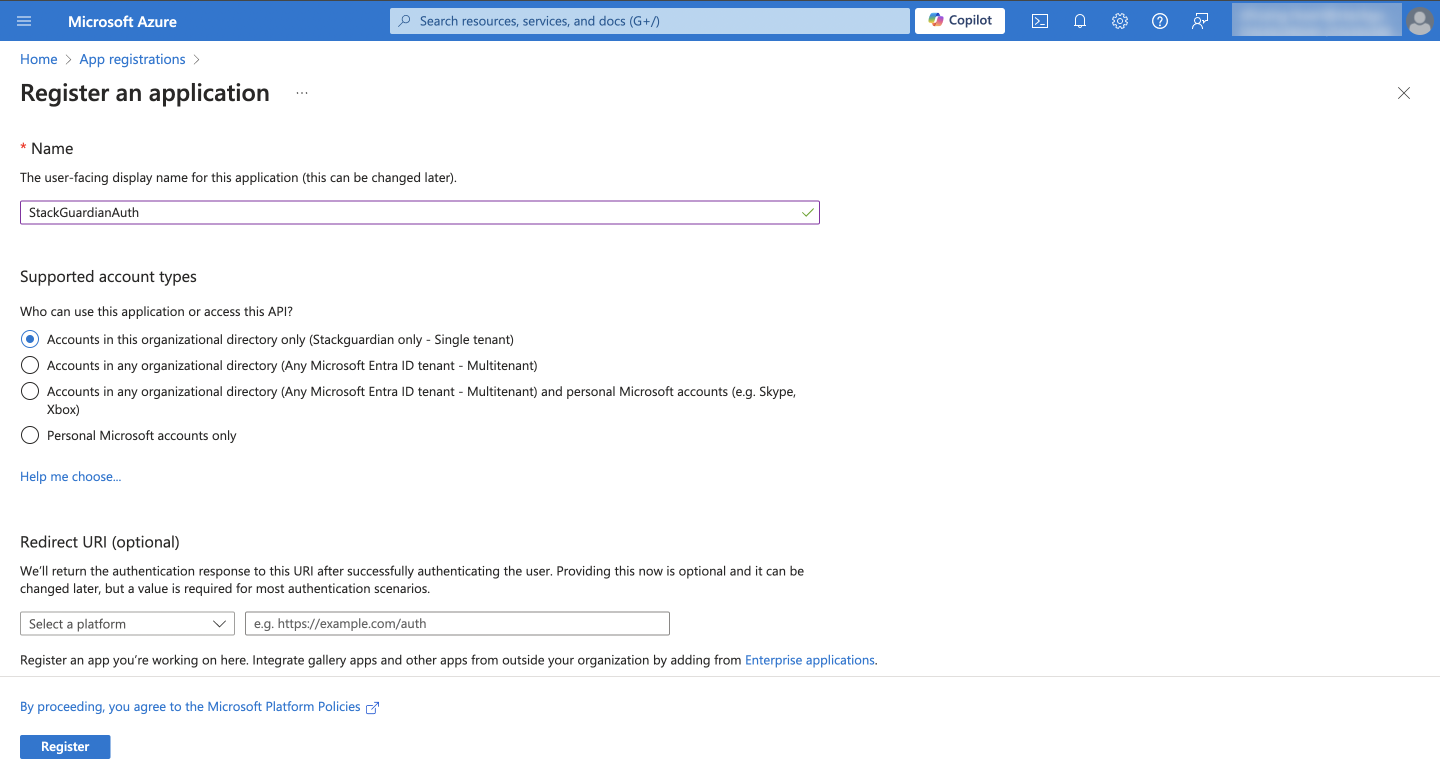
1. Creating the App Registration
-
Under Microsoft Entra ID, navigate to App Registrations and click New registration.
-
Enter the following and click Register:
- Name: StackGuardianAuth
- Supported Account Types: Accounts in this organizational directory only
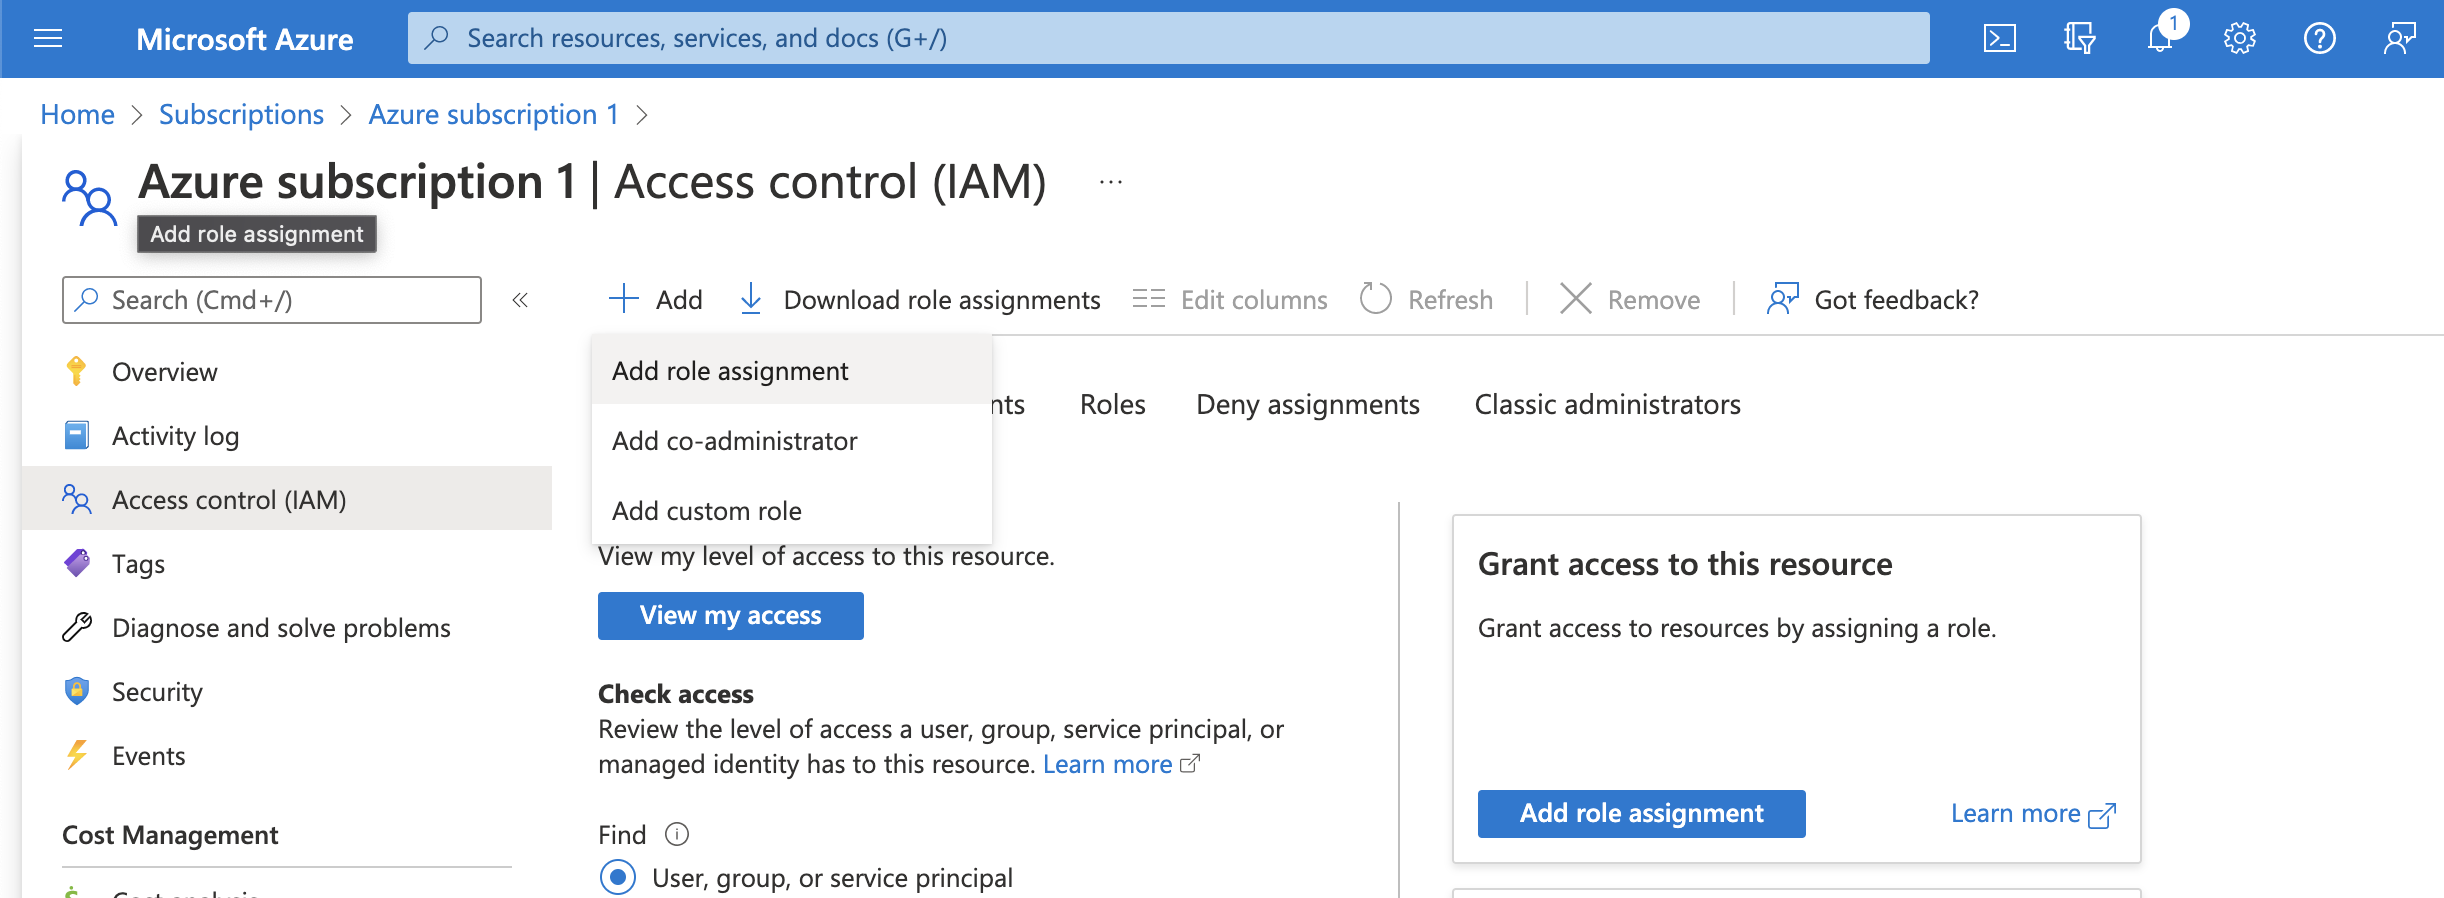
2. Granting Appropriate Permissions to the Application
-
Navigate to Subscriptions through the search box or the left sidebar.
-
Click on the subscription you want to deploy into.
-
Select Access control (IAM) and click Add > Add role assignment:
-
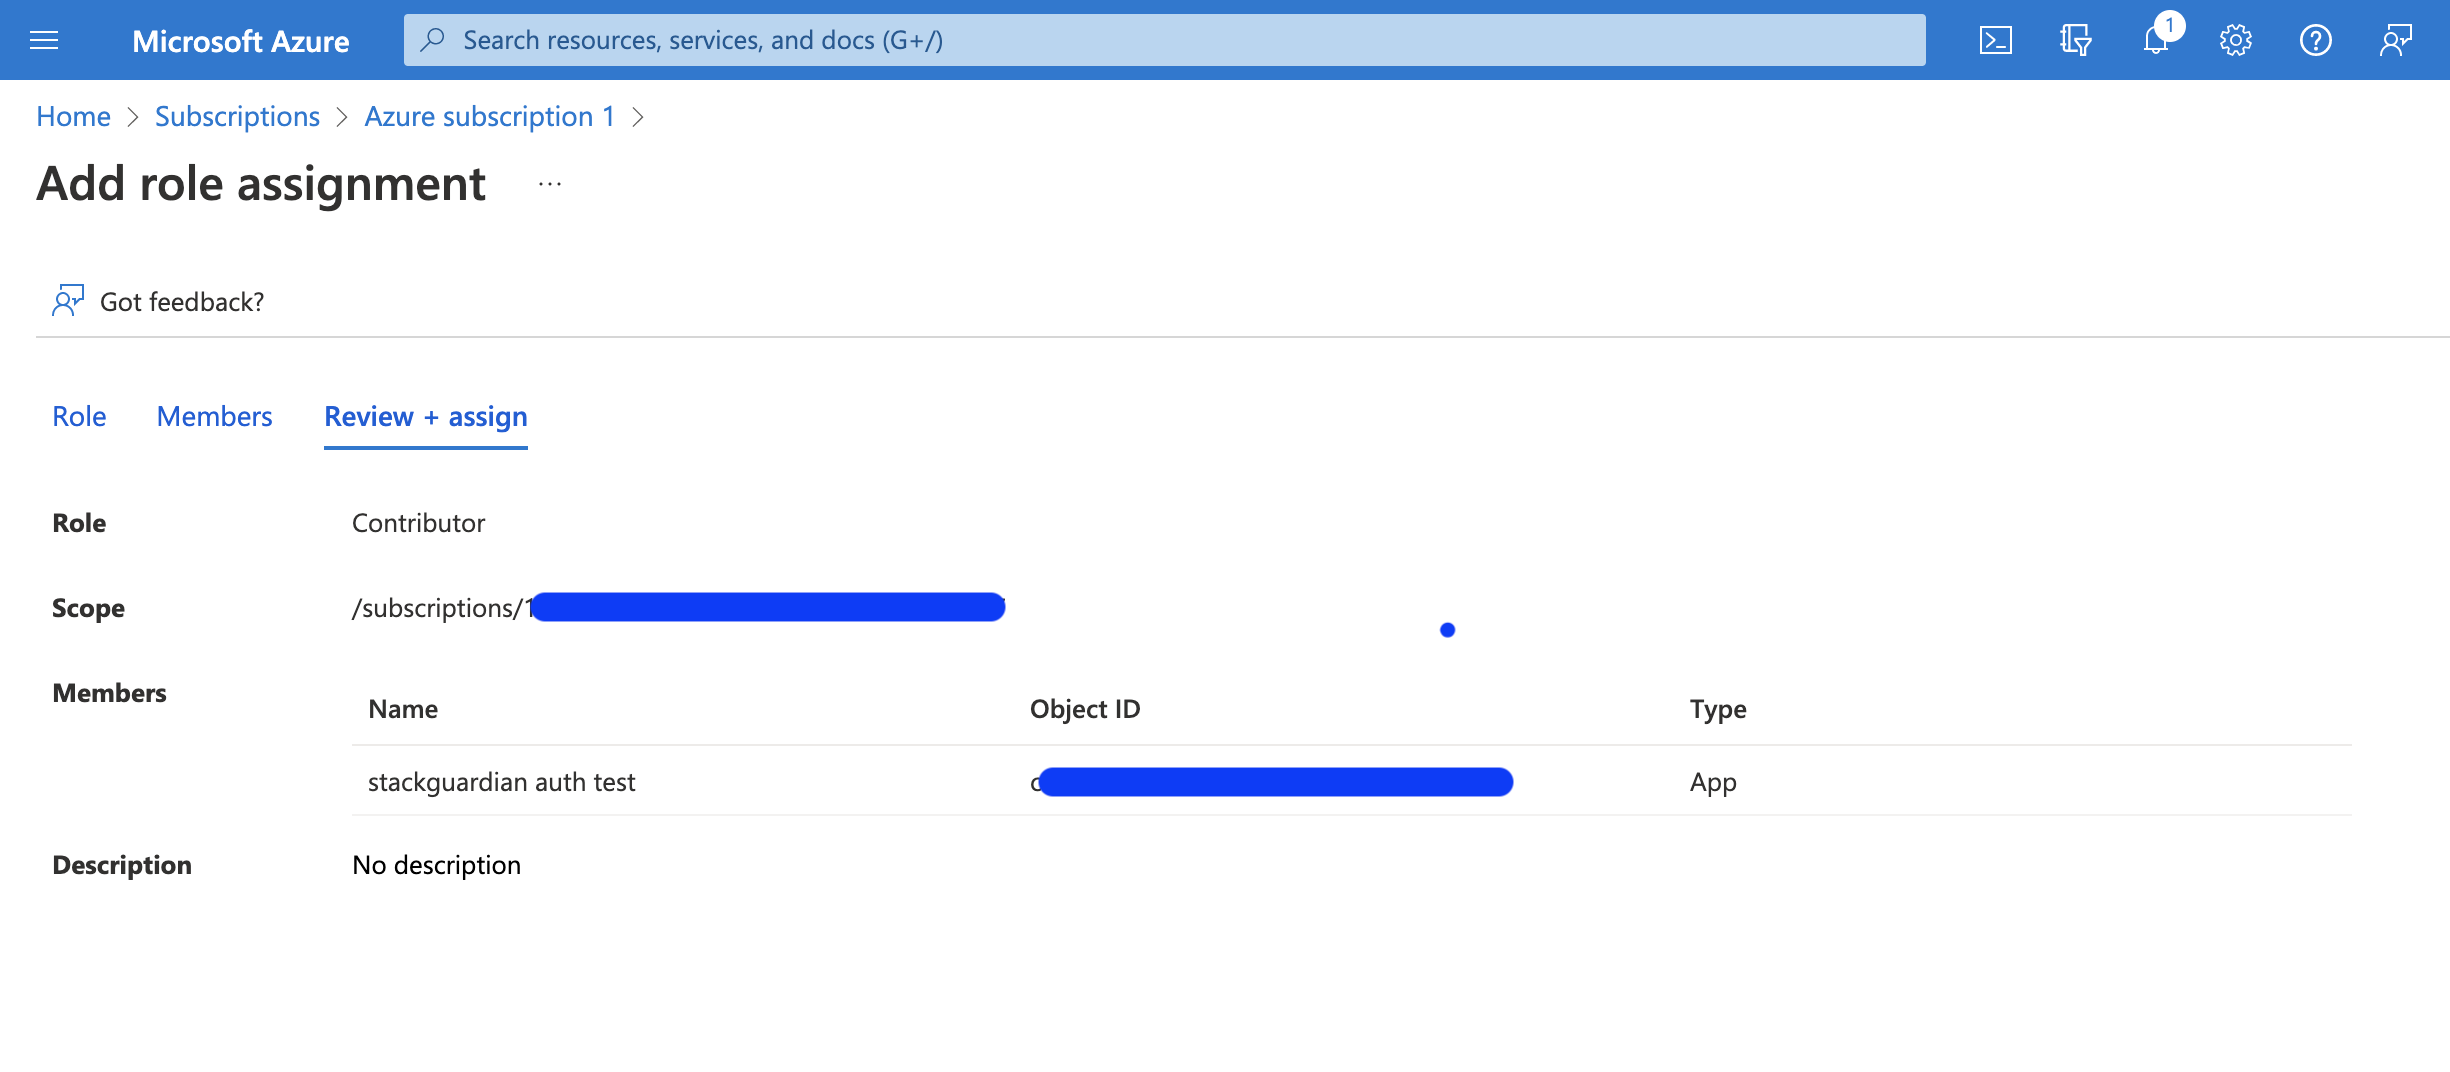
Choose a suitable role under "Role":
- "Contributor" provides read and write access.
- "Reader" offers read-only access.
Then, under "Select", choose the application created earlier and click "Review + assign".
-
Repeat this process for any additional subscriptions you want StackGuardian to manage.
The following methods can be used to connect to Azure, catering to different security and operational preferences:
Service principal with federated credentials
Service principal with federated credentials lets you authenticate without storing long-lived secrets — using short-lived tokens instead, so your credentials can't expire or be compromised in transit.
-
Create a new App Registration in Azure named
sg-oidc-federation-test. -
Go to Certificates & secrets > Federated credentials, and click Add credential.
- Federated Credential Scenario: Select "Other issuer".
- Issuer:
- For EU Region:
https://api.app.stackguardian.io - For US Region:
https://api.us.stackguardian.io
- For EU Region:
- Subject Identifier:
/orgs/<YOUR_SG_ORG>. - Name: An appropriate identifier.
- Audience:
- For EU Region:
https://api.app.stackguardian.io - For US Region:
https://api.us.stackguardian.io
- For EU Region:
-
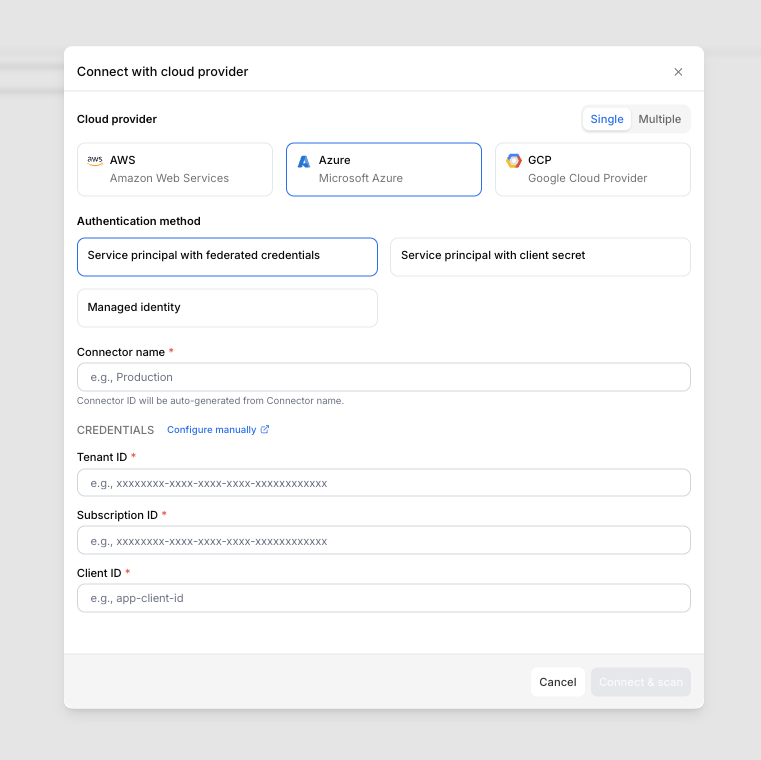
Finalize the Azure Connector configuration in StackGuardian:
- Navigate to Organization settings > Connectors > Cloud providers in StackGuardian.
- Click on Connect with Cloud Provider and select Azure.
- Select Service principal with federated credentials and provide:
- Connector name
- Tenant ID
- Subscription ID
- Client ID
- Click Connect & scan to finalize.
Service Principal with federated credentials
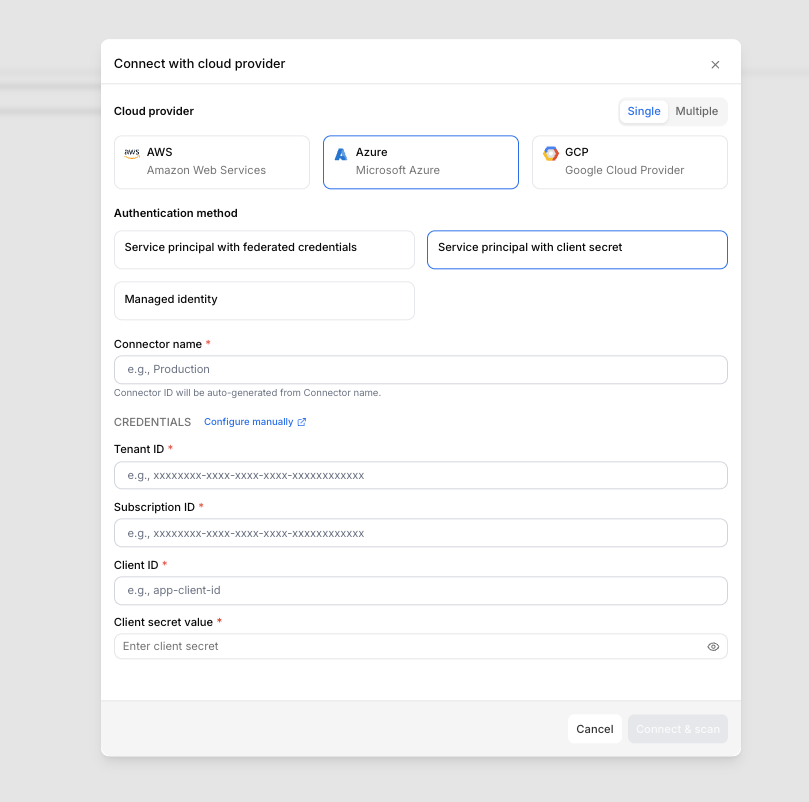
Service principal with client secret
To finalize the connector configuration in StackGuardian using a Client Secret:
-
Create a Client Secret in Microsoft Entra ID:
- Navigate to Microsoft Entra ID in the Azure portal.
- In App Registrations, select the application you created (e.g.,
StackGuardianAuth). - Under Manage > Certificates & Secrets, click New client secret.
- Provide a Description, select an expiration period, and click Add.
- Copy the client secret value immediately.
-
Use the Client Secret in StackGuardian’s Azure Connector:
- Navigate to Organization settings > Connectors > Cloud providers in StackGuardian.
- Click on Connect with Cloud Provider and select Azure.
- Select Service principal with client secret and provide:
- Connector name
- Tenant ID
- Subscription ID
- Client ID
- Client secret value
- Click Connect & scan to finalize.
Service principal with client secret
Managed identity
Managed identity allows StackGuardian to authenticate with Azure using an identity already configured in your Azure environment. No client secret is required, reducing credential management overhead.
-
Create the managed identity in Azure
- Sign in to the Azure Portal.
- Search for Managed Identities in the search bar and select it.
- Click + Create.
- Select your Subscription and Resource Group.
- Provide a Name (e.g.,
sg-workload-identity) and select your Region. - Click Review + Create, then Create.
-
Assign permissions
- Navigate to your new managed identity resource.
- In the left-hand menu, select Azure role assignments.
- Click + Add role assignment.
- Configure the following:
- Scope: Select Subscription (or Resource group)
- Subscription: Select the target subscription
- Role: Select Contributor, or a more restrictive role based on your security policy
- Click Save.
-
Configure federated identity credentials This step establishes the trust relationship between Azure and StackGuardian.
- Within the managed identity resource, select Federated credentials.
- Click + Add credential.
- In the Federation scenario dropdown, select Other issuer.
- Fill in the following fields based on your StackGuardian region:
Field EU region US region Issuer https://api.app.stackguardian.iohttps://api.us.stackguardian.ioSubject identifier /orgs/<YOUR_SG_ORG_ID>/orgs/<YOUR_SG_ORG_ID>Audience https://api.app.stackguardian.iohttps://api.us.stackguardian.ioName StackGuardian-TrustStackGuardian-TrustimportantReplace
<YOUR_SG_ORG_ID>with your StackGuardian organization ID.- Click Add.
-
Configure the connector in StackGuardian
- Navigate to Organization settings > Connectors > Cloud providers in StackGuardian.
- Click on Connect with Cloud Provider and select Azure.
- Select Managed identity and provide:
- Connector name
- Tenant ID
- Subscription ID
- Client ID
- Click Connect & scan to finalize.
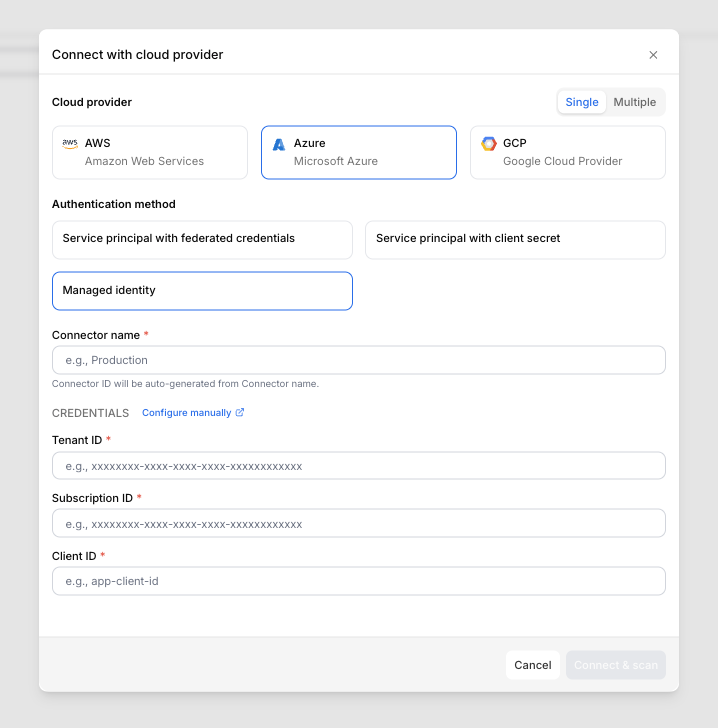
Managed identity
Multiple connectors
You can connect multiple Azure accounts at once instead of creating individual connectors — ideal for organizations managing large numbers of accounts.
1. Begin multiple connectors setup
- Log in to the StackGuardian Platform and navigate to Organization settings → Connectors → Cloud providers.
- Click Connect with Cloud Provider.
- In the connectors modal, select Multiple.
- Enter a Connector group name.
- Provide the Tenant ID, Subscription ID, Client ID, and Client secret value. Ensure the External ID matches the format
<org-name>:<random-string>or<org-name>-<random-string> - Click Next.
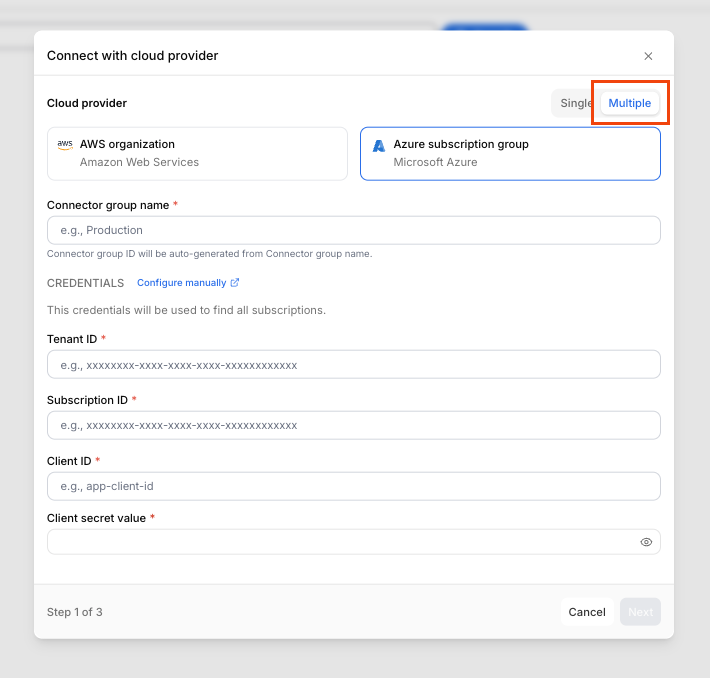
Create multiple connectors
2. Select Azure accounts
- Use the Select accounts dropdown to select individual accounts or All accounts. The list will include each account's Email and Account ID.
- Click Next.
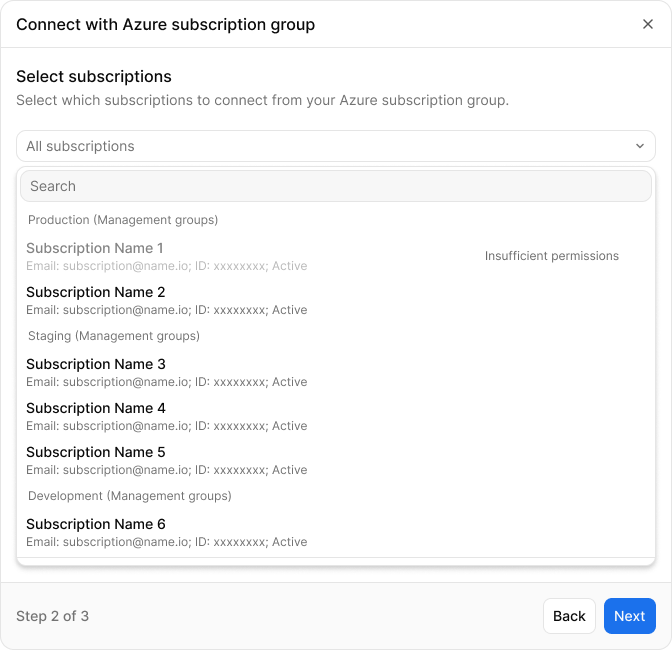
Select Azure accounts
3. Configure the subscription settings
- Under Subscription settings, fill in the Client ID for each account.
- Click Connect & scan to complete the setup.
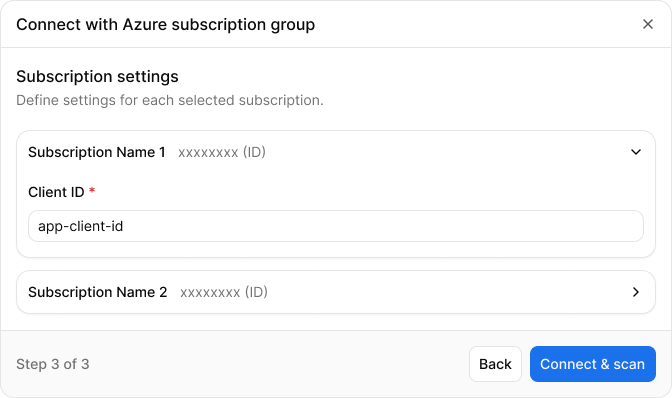
Configure default settings and individual accounts
Compliance and security best practices
- Use Role-Based Access Control (RBAC): Ensure roles and permissions are minimal and precise.
- Monitor Resources: Enable continuous discovery checks for real-time monitoring of resources.
- Use Workload Identity: Prefer this method for higher security, avoiding secret management.
Additional information
For further details, visit: