GitLab
Configure Connector
StackGuardian supports integration with both GitLab Cloud and GitLab Self-Managed, enabling you to deploy directly from your source code repositories. You have the freedom to use connectors for single repositories, groups of repositories but also multiple GitLab instances.
To integrate GitLab with StackGuardian, proceed with one of the following options:
- Personal Access Token (user-level access)
- Project Access Token (project-specific access)
- Setup Connector in SG
Option 1: Use a Personal Access Token
This method grants StackGuardian access to your GitLab account and all accessible projects.
Steps to Create a Personal Access Token:
- Log in to GitLab.
- Click on your avatar and select Edit profile.
- Go to Access Tokens in the sidebar.
- Click Add New Token.
- Provide a name for the token.
- Optionally, set an expiry date (default is 365 days).
- Select the api scope.
- Click Create Personal Access Token.
- Copy and store the token securely. It will not be shown again.
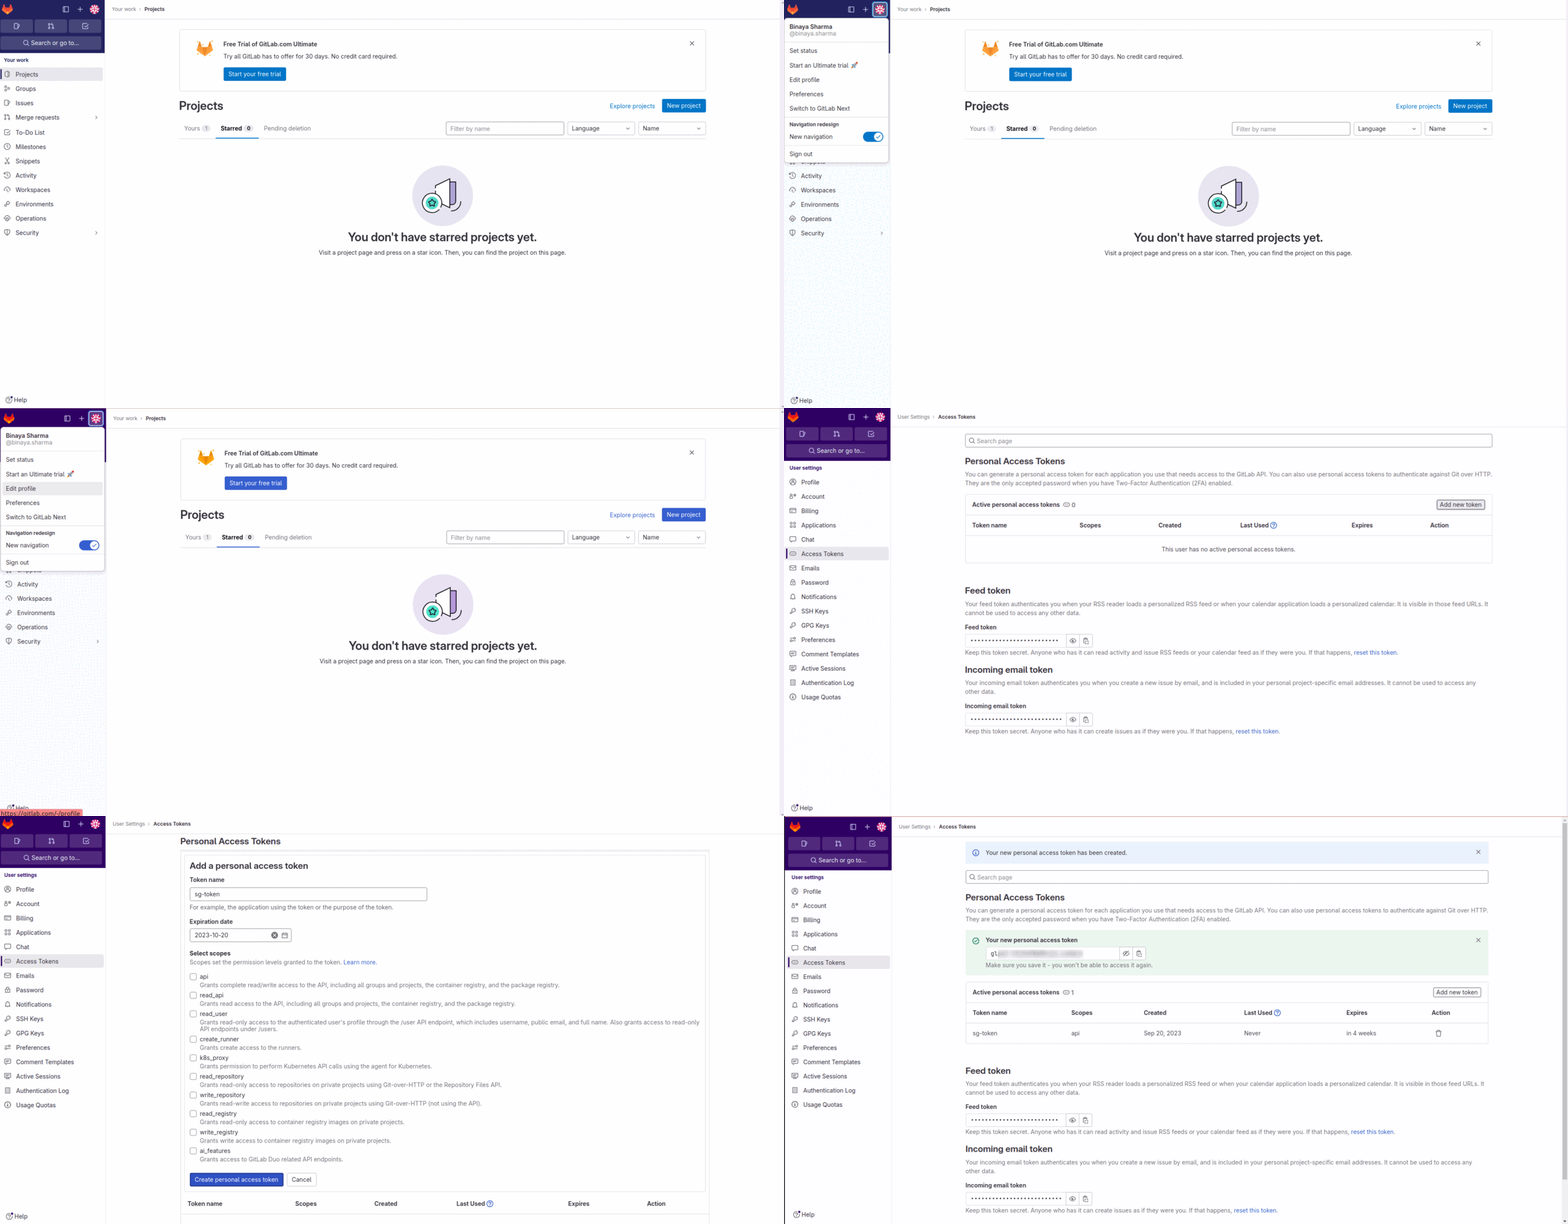
GitLab Token Creation
Option 2: Use a Project Access Token
This method limits StackGuardian’s access to a specific GitLab project.
Steps to Create a Project Access Token:
- Log in to GitLab.
- Open the desired project.
- Go to Settings > Access Tokens.
- Click Add new token.
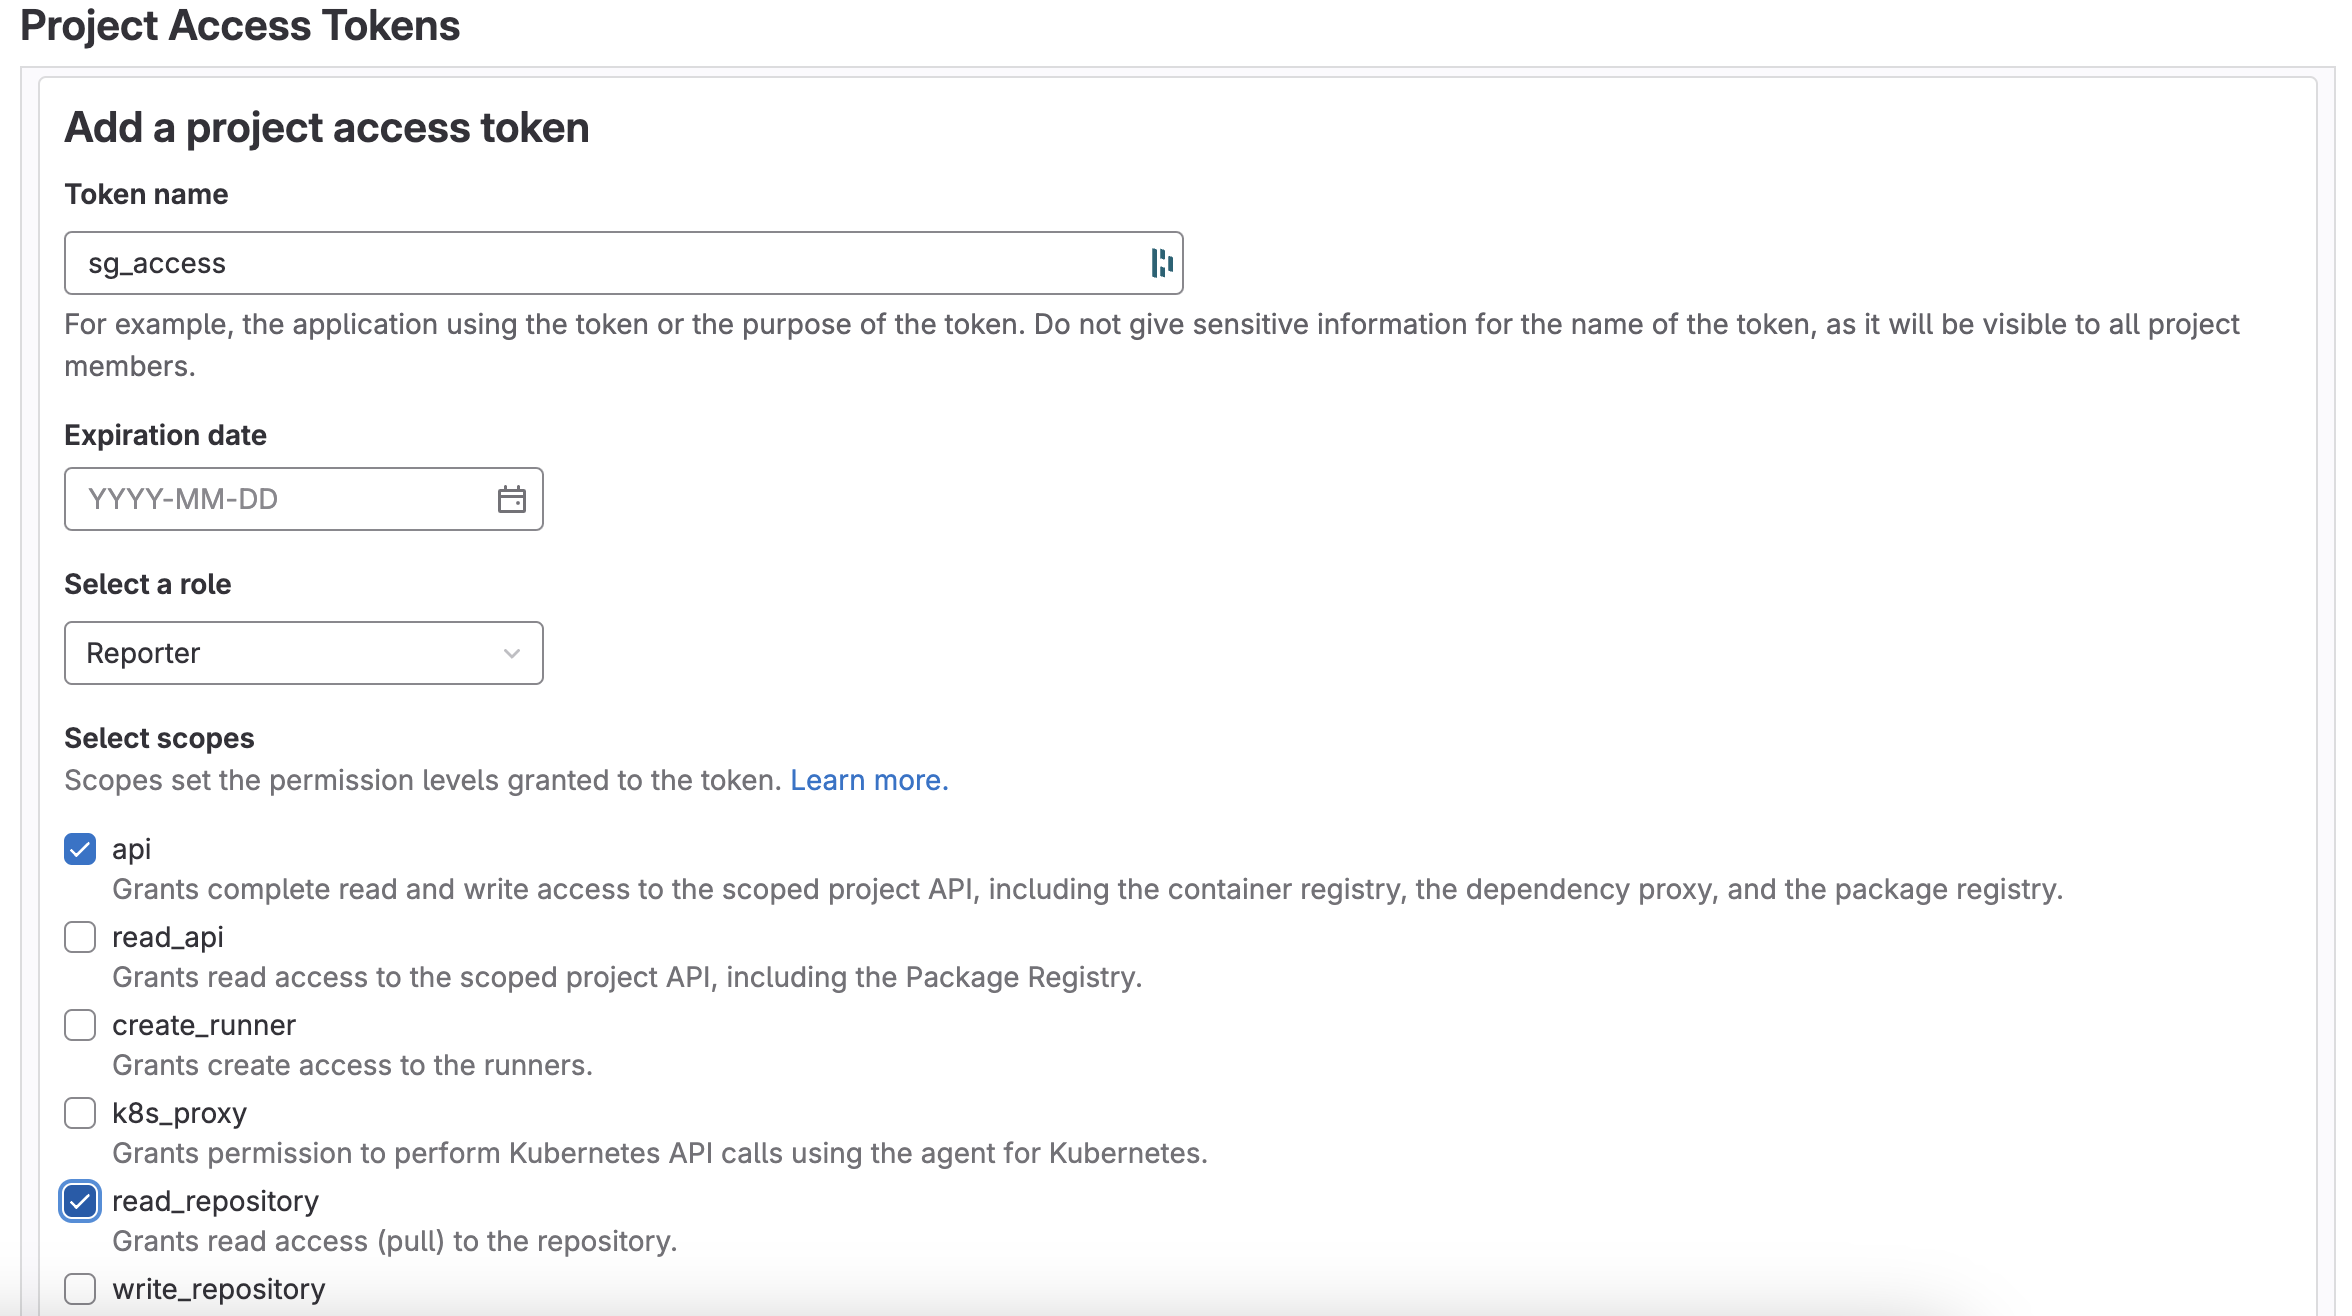
- Enter a token name.
- Set an expiry date (up to 365 days).
- Choose a role: Reporter or higher.
- Select scopes:
read_repository: Allows reading the repository.api: Permits API access that includes various read and write actions.
- Click Create project access token.
- Save the token securely. It won't be shown again.
Handle the Project Access Token with care, as it grants repository access.
Set Up the Connector in StackGuardian
Once you have the token, follow these steps:
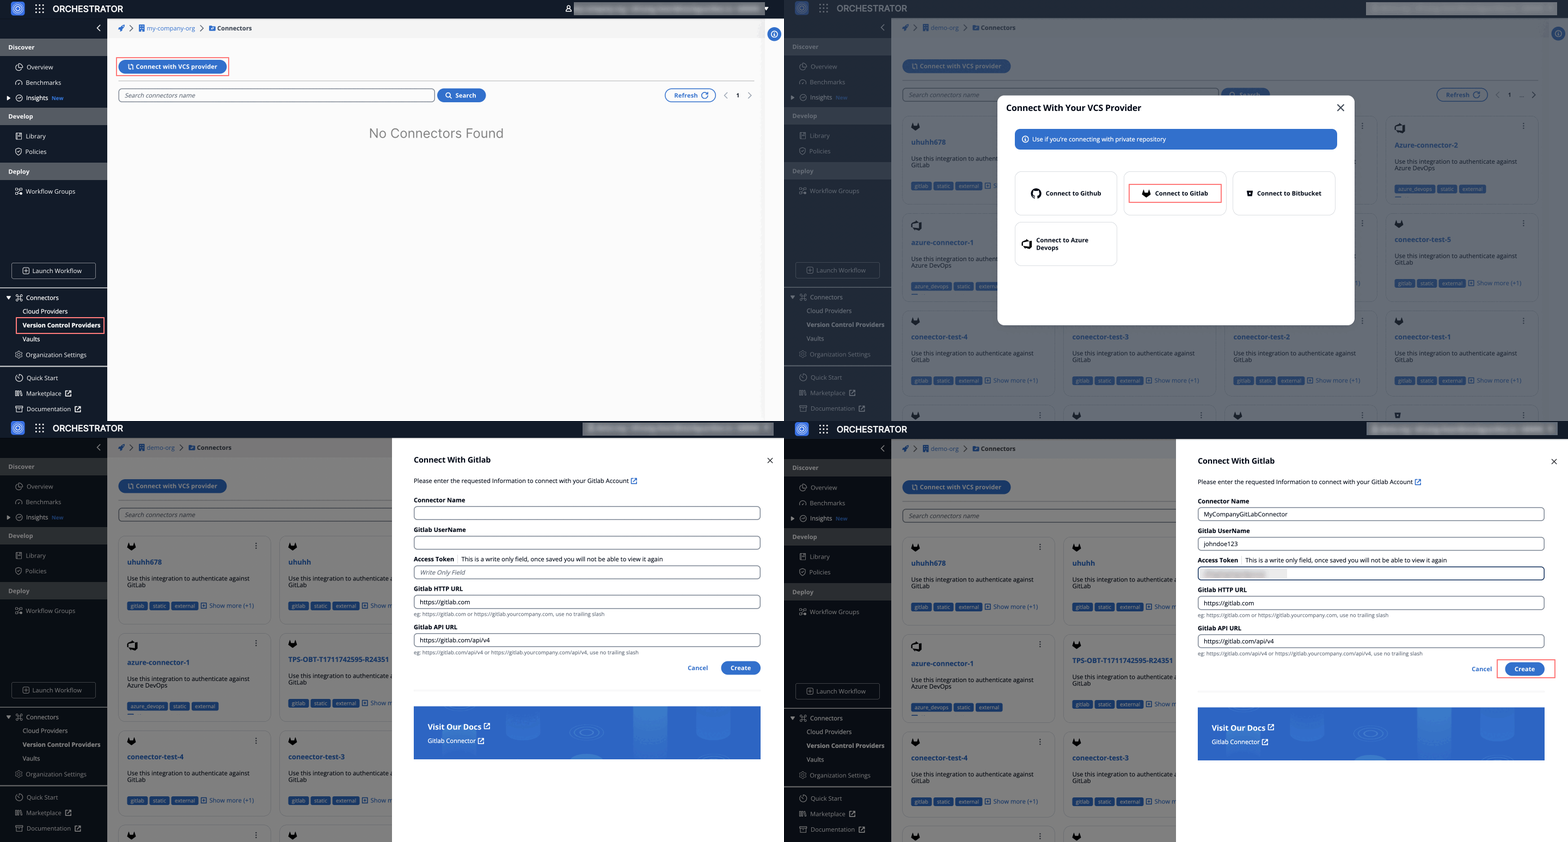
- Go to the Orchestrator > Connectors tab.
- Select Connect to GitLab.
- Fill in the details:
- Connector Name: Enter a descriptive name, like MyCompanyGitLabConnector.
- GitLab Username: GitLab username
- Access Token Paste your previously generated Access Token here.
- GitLab HTTP URLThe web address for GitLab access, typically
https://gitlab.comfor GitLab's cloud service or a custom domain for self-hosted instances. - GitLab API URL The endpoint for API calls, generally
https://gitlab.com/api/v4for GitLab's cloud-hosted users.
- Click Create.
You can configure VCS triggers to automatically run workflows in response to GitLab events such as pushes, pull requests, and tag creation. See Workflow triggers.
If your GitLab pipeline status stays at "Pipeline created" after a merge request merges into a protected branch, this is usually a GitLab permissions setting, not a workflow failure. Your StackGuardian workflow still runs and completes successfully.
GitLab lets you restrict which roles can push directly to a protected branch, separately from a token's overall role. If your connector token has the API scope and Maintainer role, but Maintainers aren't allowed to push to the protected branch, GitLab blocks the status update along with the push.
To fix this, check your protected branch settings in GitLab and allow the role your connector token uses to push to the branch. This doesn't affect feature branches, since they're usually unprotected by default.